Description
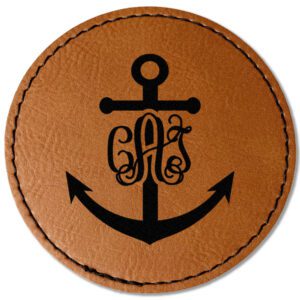
Iron On Patches On Leather
Iron-On Patches on Leather: A Guide to Personalization
Leather jackets, bags, wallets – these timeless staples hold a special place in our wardrobes. They exude a sense of sophistication, durability, and effortless style. But what if you want to personalize your favorite leather item and give it a unique touch? Enter the world of iron-on patches, a convenient and creative way to add personality and flair to your leather belongings. WE also have Leather Jacket With Patches
Leather’s Allure and Its Customization Challenge 
Leather is a naturally beautiful material, prized for its strength, character, and ability to age gracefully. However, its very qualities can present a challenge when it comes to customization. Unlike fabric, traditional embroidery or sewing methods on leather require specialized tools and skills. Iron-on patches offer a solution, allowing you to personalize your leather items easily at home.
Iron-On Technology: A Boon for Leather Customization
Iron-on patches utilize a special heat-activated adhesive backing. Here’s how it works:
- The Patch: Iron-on patches typically come pre-made with a design or logo already embroidered, woven, or printed onto a fabric base.
- The Adhesive Backing: This heat-activated layer adheres the patch to the leather surface when ironed correctly.
Benefits of Iron-On Patches for Leather
Iron-on patches offer several advantages for personalizing your leather belongings:
- Convenience: The process is simple and requires minimal tools, making it ideal for those who lack sewing skills or specialized equipment.
- Versatility: Iron-on patches come in a vast array of designs, colors, and sizes, allowing you to find the perfect match for your taste and style.
- Durability: Modern iron-on patches utilize strong adhesives that can withstand wear and tear, ensuring your personalized touch lasts.
- Quick and Easy Repairs: Iron-on patches can also be used to cover minor imperfections or tears on your leather items, extending their lifespan and maintaining their aesthetic appeal.
Before You Iron: Considerations for Leather
While iron-on patches offer a convenient solution, it’s important to be mindful of your leather item when using them. Here are some factors to consider:
- Leather Type: Thicker leathers like full-grain or saddle leather might require a higher heat setting or a pressing cloth for better adhesion. Conversely, thin or delicate leathers might be susceptible to heat damage.
- Leather Condition: Always test the iron-on process on a hidden area of your leather item to ensure the material can withstand the heat. Avoid using patches on pre-treated or heavily oiled leathers as the adhesive might not adhere properly.
The Art of Ironing On: A Step-by-Step Guide
Ready to personalize your leather item? Here’s a step-by-step guide for applying iron-on patches:
- Gather Your Supplies: You’ll need your iron-on patch, a regular iron (set to a heat setting appropriate for your leather type), a flat ironing surface, and a pressing cloth (optional) for thicker leathers.
- Prepare Your Leather: Ensure the area where you want to apply the patch is clean and free of dirt or dust.
- Position the Patch: Place the iron-on patch in the desired location on your leather item.
- Apply Heat: Set your iron to the recommended heat setting for your leather type. Consult the patch instructions or test on a hidden area if unsure.
- Press and Hold: Using the iron, press firmly on the patch for the recommended duration, typically 30-60 seconds.
- Secure the Bond: While the patch is still warm, use a circular motion and firm pressure to further secure the edges. Consider using a pressing cloth on thicker leathers to avoid scorching.
- Let it Cool: Allow the patch to cool completely before touching or using your leather item.
Beyond the Basics: Tips and Tricks for Success
Here are some additional tips for a successful iron-on application on leather:
- Test First, Apply Later: Always do a test application on a hidden area of your leather item before applying the patch to the intended location.
- Use Parchment Paper: Place a sheet of parchment paper between the iron and the patch to prevent scorching the leather or melting the adhesive.
- Reinforce the Bond (Optional): For added peace of mind, especially on heavily used items, you can further secure the patch by stitching around the edges after it cools completely.


