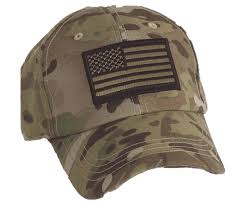
Description
Iron Patch Onto Hat
Iron Patch Onto Hat is a convenient way to add a personal touch, but it’s important to know the limitations of this method. Here’s a breakdown of ironing a patch onto a hat. We also have Custom Patch Trucker Hats
Pros:
- Convenience: Iron-on backing allows for easy application at home, no sewing required.
- Good for Beginners: A user-friendly option for those new to customizing hats.
Cons:
- Less Secure: The bond between the iron and the patch might weaken over time, especially with frequent wear or washing.
- Heat Sensitivity: Not all hat materials can tolerate high heat, which is necessary for ironing.
Here’s what to consider before ironing a patch onto your hat:
- Hat Material: Check the care label on your hat. Delicate fabrics or materials that don’t tolerate high heat (like wool or silk) won’t be suitable for iron-on patches.
- Frequency of Wear: If you plan to wear the hat often, consider sewing the patch on for a more secure attachment.
- Washing: Iron-on patches might not withstand frequent washing, so handwashing the hat might be necessary.
Steps to Iron Patch Onto Hat (if the material is compatible):
- Gather your supplies: Iron, ironing board, patch with iron-on backing, thin cloth or pressing cloth (like a pillowcase).
- Prepare the hat: Place the hat on a sturdy surface or wear it inside out on a head-shaped form (improvise with a rolled towel if needed).
- Position the patch: Carefully place the patch exactly where you want it on the hat.
- Protect the patch: Cover the patch with the thin cloth or pressing cloth.
- Heat up the iron: Set your iron to the heat setting recommended on the patch instructions (usually medium heat). Important: If your iron doesn’t have heat settings, err on the side of caution and use a lower setting to avoid scorching the hat material.
- Apply heat and pressure: Hold the iron firmly in place and press down for the recommended time (usually around 15-30 seconds). Move the iron in a circular motion for even heat distribution.
- Let it cool: Allow the patch to cool completely before removing the pressing cloth and checking the bond.
- Iron from the back (optional): For extra security, turn the hat inside out and repeat steps 4-6, ironing the patch from the back.
Alternatives to Iron Patch Onto Hat:
- Sew-on Patches: The most secure option, ideal for any hat material. You can sew them on yourself or have a tailor do it.
- Custom Patch Companies: Many companies offer sew-on patches as well as iron-on options.
Remember: Iron Patch Onto Hat can be a quick way to add personalization, but be sure to consider the hat material and how you plan to wear and wash the hat to ensure the patch stays on securely.